Time to face the next challenge – the construction of the landing gear lever!
As you might know, I bought a complete set of MIP-Panels without any mechanical parts. So my challenge is now, to fill the MIP with all working components like in the real Airbus A320. So let’s get started!
Research
Like with every part you’re planning to build, the first step should be to research the internet on any knowledge. Use Forums like flightx.net or look for in-flight Videos on Youtube! You can find very good pictures of the original lever on Ben’s soarbywire.com Blog!
The mechanism of the Airbus A320 Family Landing Gear Lever is working as follows: The Lever locks in two positions, the Gear Up and the Gear Down position. To move it up or downwards, you have to pull it out for about two centimeters. After moving to another position, the lever snaps in again. Two microswitches will detect, in which position the lever is and send the signal via an interface card to the simulator.
Regarding the mechanism, I found very helpful advice on the following websites, even if those aren’t related to Airbus Homecockpits:
- http://homecockpit-737ng.blogspot.com/p/gear-lever.html
- http://boeing737-homecockpit.blogspot.com/p/blog-page_27.html
Thanks a lot to Burkhard and Julian for their work!
Time to get to work!
Inspired by those reports, I began to create my own gear lever. My starting point was just a small gear lever panel, I got from my MIP.


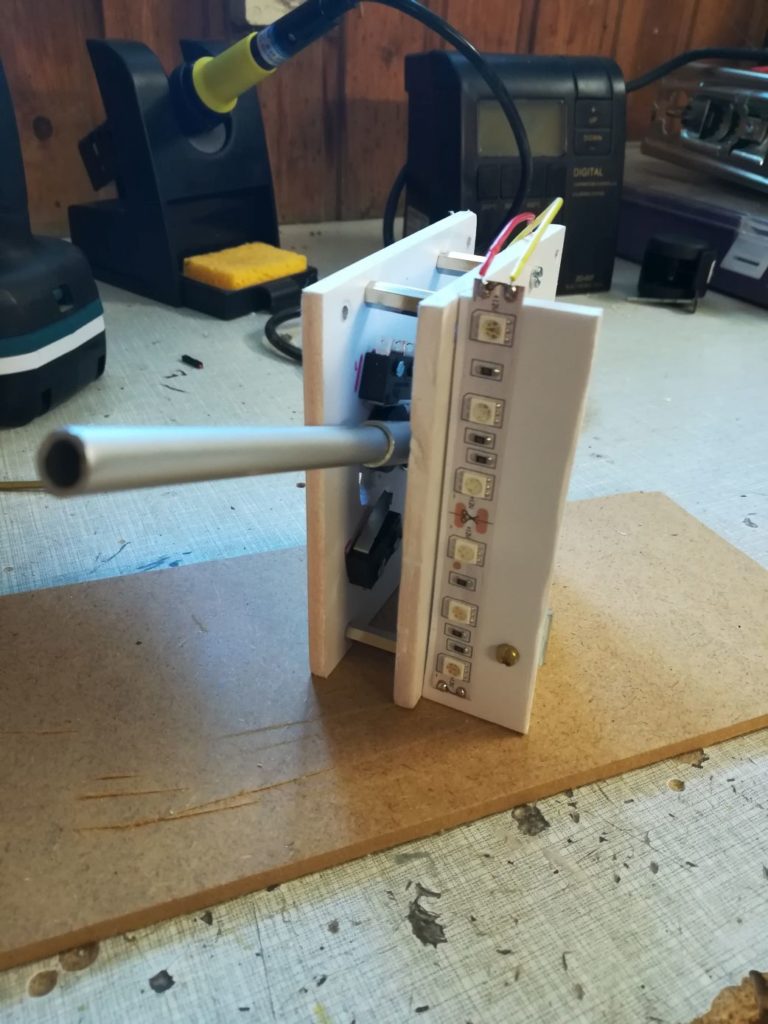
For the lever itself, I decided to use two aluminium pipes that will slide in one another to ensure a smooth and stable travel when the lever is pulled out. Then I drilled a long hole of about 2 to 3 cm into the bigger pipe, following a 4mm hole into the thinner pipe. When you put a 4mm (M4) screw through the small hole, you can imagine how the mechanism will work.
The next step is very important, as this will decide, if the lever is going to move smooth and with the correct distance within your panel. So now you need two carrier plates with absolutely even edges on that side, that will later contact your Main Instrument Panel. Drill a M4 hole in it and mount the aluminium pipes on it. Now you can hold your Gear Lever Panel in front of it and simulate the movement of the lever. Draw the movement onto your carrier plate to get the template for the cuts. This step is really complex and you might need four hands 🙂


Now you can mount all parts and simulate the movement and pull-out mechanism of the lever. I had to rework it several times, as the lever sometimes stuck because of uneven edges. Instead of a M4 screw, I decided to use an aluminium bar and (great idea of Burkhard!!) fixed it with rubber washers. The movement now got much smoother and quieter.


When your lever is moving quiet and smooth, you can face the next step: Mounting the microswitches and constructing the backlight. Regarding the backlight, there is something to know: In the real Airbus A320 Family, the arrow on the gear lever panel is illuminated red or green in some conditions. For example, when the landing gear isn’t locked down and the aircraft is in landing configuration, it is illuminated in red. To read more, check out the documents to the landing gear on smartcockpit.com.
Nevertheless, I decided not to implement any red or green backlight, as this seemed too complex to me. Remember, that you would need to query all the conditions from the simulator and then create a backlight with several colors like red, green and amber for the regular panel backlight. So my backlight is just amber in any case. Future modifications not impossible 😉


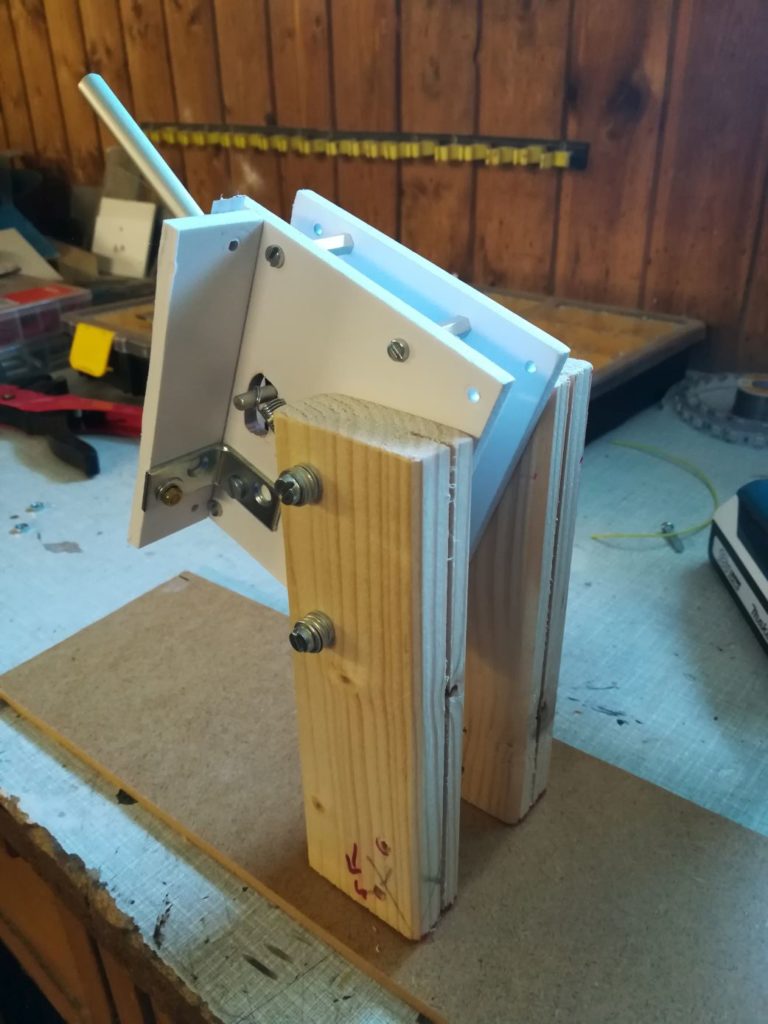
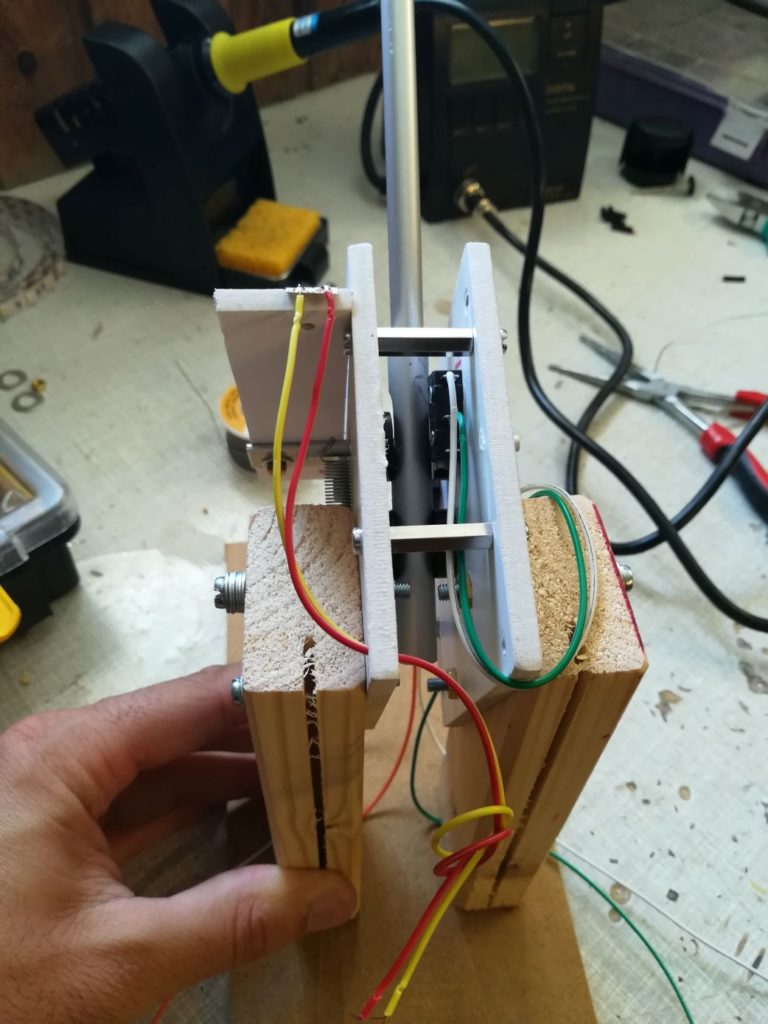
Now it was time to mount the gear lever behind the MIP. It took quite some time to find the best solution, because there isn’t much space behind the MIP. In the end, I decided to use two strong wood pales. They’re holding the lever stable in place and I can fix them with screws, so the lever can be disassembled if needed. Pictures are telling more than words 🙂

The final challenge was then, to find a suitable handle for the landing gear lever. It was really a coincidence that I found two parts, left from the baby fence of my daughter that looked pretty true to the original handle. After mounting them, they don’t look quite bad, but they are a bit too big. Not the best solution for sure, but better than no handle at all 🙂


Let me know your thoughts about this! How did you realize your landing gear lever? Do you have any questions? Best regards! 🙂


6 Comments
Florian · July 30, 2018 at 8:47 pm
Hi Marco,
Wenn du mir ein STL File schickst, kann ich dir eventuell den Handle bei uns im Fablab im ResinPrinter drucken?!
Marco Streeb · July 31, 2018 at 12:14 pm
Hi Florian, danke für dein Angebot! imax2010 aus flightx.net wollte sich das auch anschauen… mal abwarten was er berichtet.
Viele Grüße!
Andrea · January 6, 2021 at 8:02 pm
Hi, how much to make this for me? I really Need this mechanism. Are you in Germany?
Marco · January 7, 2021 at 12:23 pm
Hello Andrea, unfortunately I don’t have the time to make parts for selling purposes. Yes, I am located in Germany. Best regards!
Mathieu · July 25, 2022 at 11:59 pm
Hello. I am struggling finding aluminum pipes as you describe them. Do you recall the diameter of each one? Thank you!!
Marco · August 20, 2022 at 2:51 pm
Hey Mathieu, please excuse the delay. The diameters are 12 and 10 mm.