Hi Guys! 🙂 Long time no see!
As promised, here comes my report about my new visual concept.
A few words about general thoughts when you are planning your homecockpit visual. My first intention was to run the visual with short-throw projectors, as they provide an absolutely realistic experience you just cannot compete with screens.
Unfortunately, in the end this didn’t turn out to be a suitable solution for my circumstances for two reasons.
- First. The ceiling of my homecockpit room is not very high, so the required height for the projectors not to cast a shadow onto the screen was very close to insufficient.
- Second. The ceiling is furthermore made of cavity bricks and I can only hardly estimate, how much weight they are able to carry about a long distance.
So I finally decided, not to take the risk of being torn out of sleep in the middle of the night by the sound of two x-hundred dollar projectors crashing down right onto my x-hundred dollar Glareshield-Panel!
Screens or Projectors?
The only option left was to use screens instead. Screens have the advantage that they can be setup pretty easy and fast. Modifications can be easily made at anytime. For example, if you want to add a third or fourth screen for the side views in the future, this is nearly plug and play.
After some calculations about the best size and mounting position, my decision fell to use two large TVs for the front view. I just didn’t want to have two frames in the middle of the front view, like it would have been if I used three TVs.
So I began to research for affordable TVs coming with a thin frame to minimize the gap between the two screens. Finally, I decided to buy two cheap-but-good 49″ LED TVs (Vendor: Telefunken). The TVs are 4K capable, but they will need to run on high definition resolution only. When they arrived, the next challenge was to mount them in the suitable height. So one more time, creativity was the thing asked for!
The TV-Stand
I knew I didn’t have much space left between cockpit-front and wall, as this should be the place to store my computers, ventilation tubes and lots of cables. After some brainstorming, I decided to use small side tables made of robust metal. (Found at IKEA!)
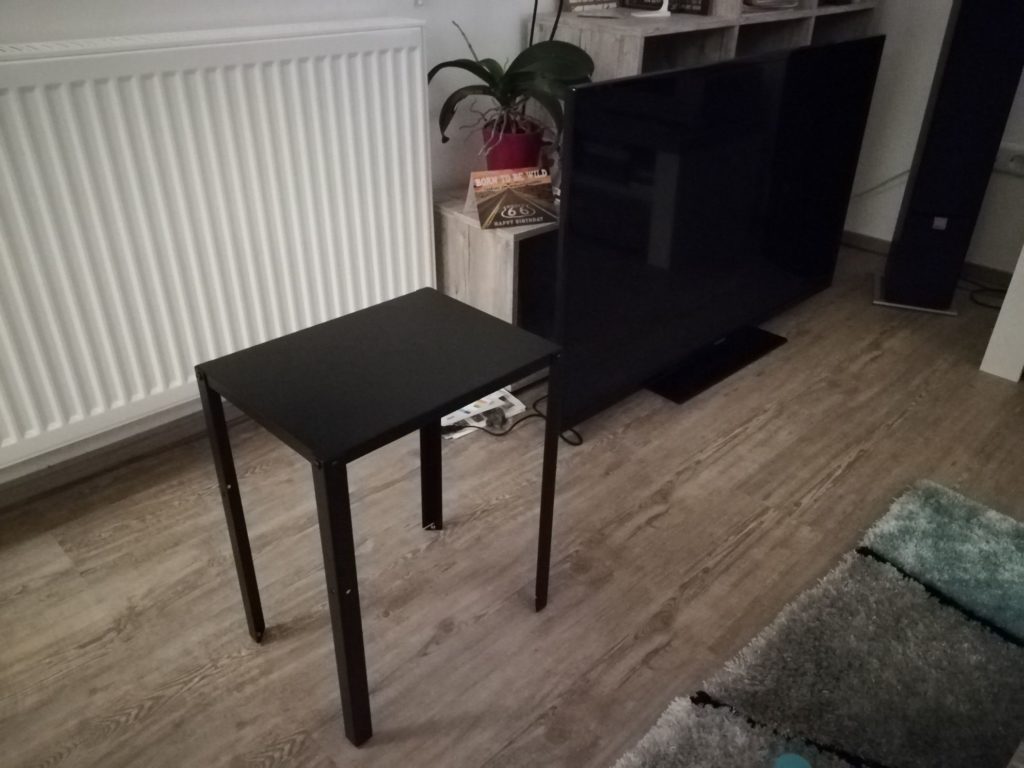
They should be placed right overhead the computers, so the computers can still be accessed for maintenance reasons, by simply pulling them out.
After mounting the tables, it showed that they were a little bit two low and needed to be lifted by two centimeters. I realized this by mounting two 20x20mm wooden slats beneith their feet. The tables now slide easily over the floor, too.
Connecting the TVs and starting up!
Now it was time to get the TVs up to their destination! As I knew that they would probably not fit the needed height exactly, I lifted them by using 80x80mm wood posts on an interim basis. This is a pretty stable construction that can last until the final mounting position is found and all the work around the cockpit front is done.
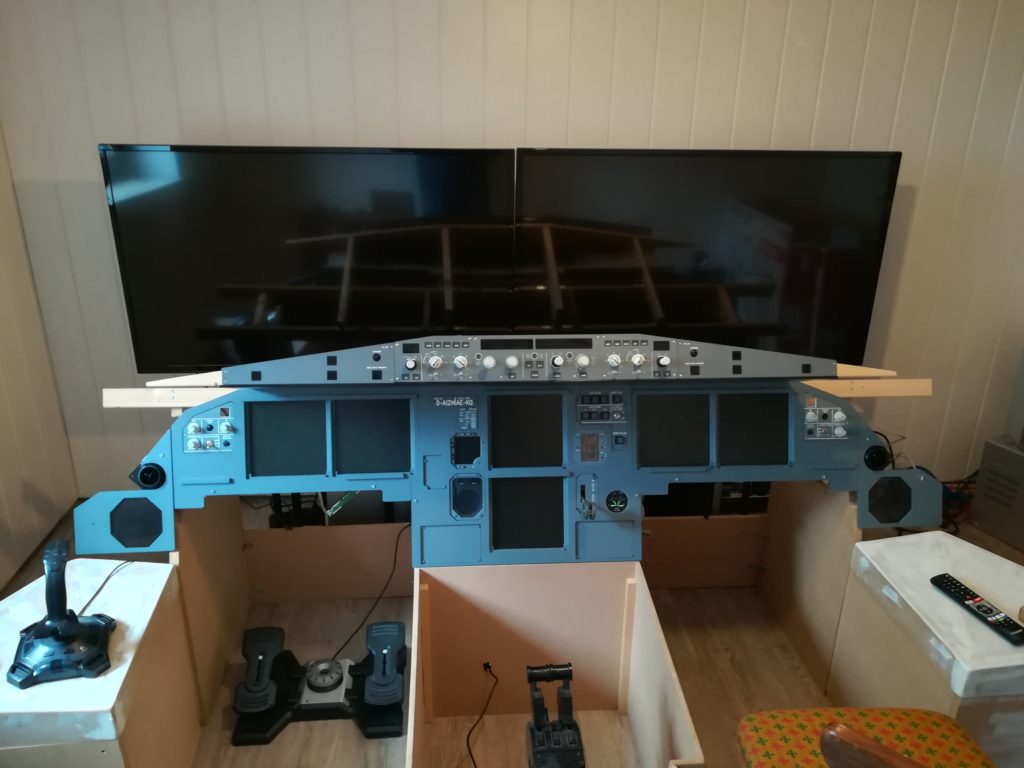
As you can see, the TVs are fitting the size of the real cockpit windows pretty well for a first shot! Surely, a lot of fine-tuning will be needed when the shell will be built around the cockpit later. But this should’nt bother us by now.
The software configuration was pretty easy. The TVs are running a native 4K resolution and were configured as one big display in NVidia Surround. Check your graphics card’s driver settings and tools.
In FSX or P3D, the resolution setting still stays at 1920×1080. You can simply stretch the application window about both screens. Enjoy the feeling at your first take off 🙂
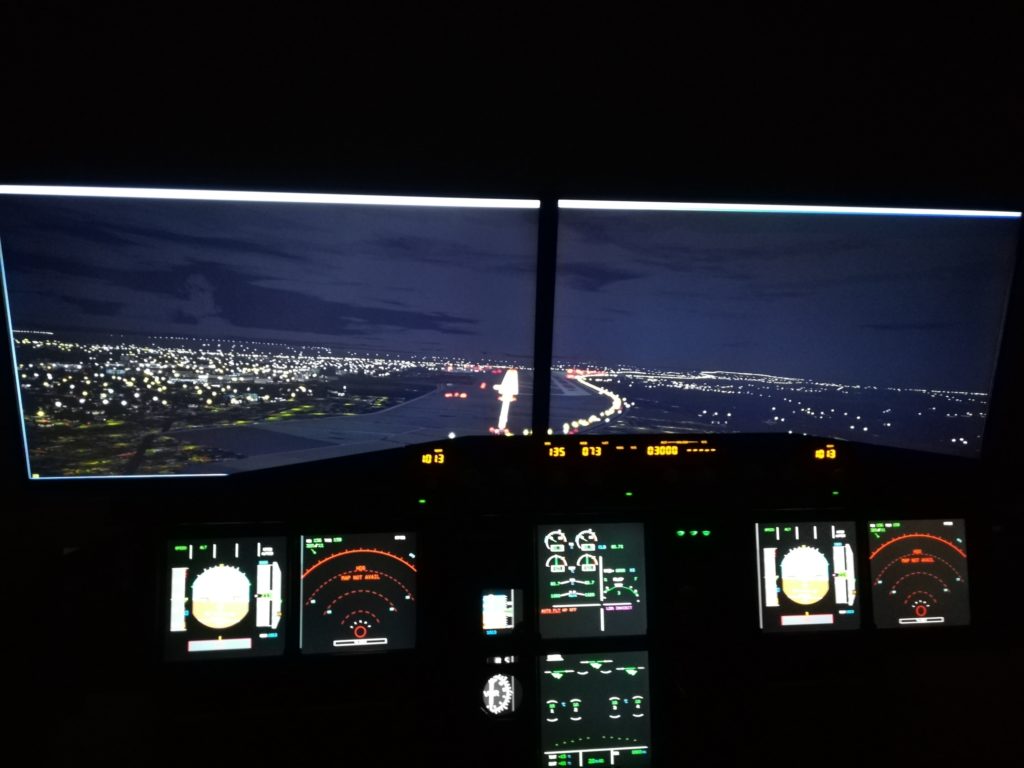
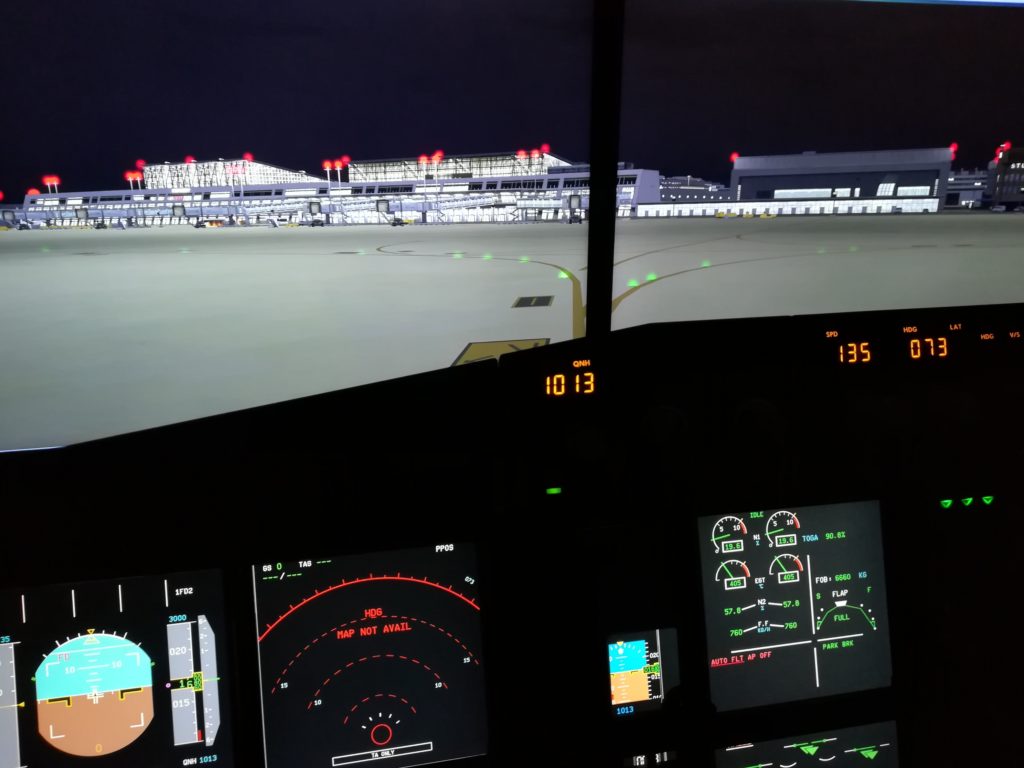
I really have to say – I’m impressed of the experience on realism those two TVs are creating. This definitely exceeded my expectations.
As you can see in the images, the borders of the application are still visible. This is fine-tuning. Imagine how cool this could be with two more TVs, one at each side…
but enough for today 🙂

5 Comments
Uwe · May 23, 2021 at 10:46 pm
Hallo Marco,
aus Platzgründen wird bei mir das Sichtsystem wahrscheinlich auch aus TV-Monitoren bestehen. Bist du mit deiner Lösung nach wie vor zufrieden oder hast du doch noch auf Beamer gewechselt?
Viele Grüße
Uwe
Marco · May 26, 2021 at 5:26 pm
Hallo Uwe, ich nutze aktuell noch immer die TV’s! Beamer wären besser, ohne Frage, aber ob das platztechnisch funktionieren würde, muss ich sehen sobald das Cockpit von der Struktur her fertig aufgebaut ist.
Viele Grüße,
Marco
Uwe · May 27, 2021 at 3:02 pm
Hallo Marco,
danke für die Info. Beamer wäre auch bei mir besser. Der Platz für eine Projektionsfläche dürfte aber sehr eng werden. Ich bin mir nicht ganz sicher, ob es mit zwei TVs nicht zu einer Verschiebung der Perspektive kommt. Man sitzt im Cockpit ja nicht mehr direkt vor dem Bildschirm sondern etwas nach links oder rechts versetzt. Daher meine Frage, ob du noch immer TVs einsetzt.
Viele Grüße
Uwe
Francisco Gutierrez · September 19, 2023 at 3:57 am
Hi Marco! How has your experience been with the two TVs. My main doubt is how annoying it is to have the two screens join right in the visual center. How annoying this is, for example, on the final approach to land. I have heard that the runway is not visible while approaching. Greetings!
Marco · August 1, 2024 at 10:35 am
Dear Francisco, this was indeed a little problem for which I didn’t find a quick solution. My thought was, if you later may have a shell construction, the middle bar between the windows may hide the overlaying/switching frame a bit. Greetings!