I’m sure you have already checked out some prices for home cockpit parts of manufacturers. Well, I felt the same when I saw them for the first time. That’s why I’m going to show you the possibilities and best practises of DIY in a home cockpit project, so you can build your own one.
The Airbus Instrument Panels
If you take a look at the airbus instrument panels, you will quickly see that new replica parts seem to be very expensive at the first

A320 Autobrake-Panel (replica)
view. But if you carefully calculate the costs for acrylic glass, engraving, paint, switches and buttons, the korrys, backlighting, wiring, electronic interfacing (so you only have to connect the USB-cable from your PC) and wage – things look a bit different.
Nevertheless, there is still money to save. How much depends on the complexity of the individual part. I would clearly not recommend to make yourself a FCU for example, except you are very talented in soldering and electronics in general and you have much time left. The MCDU on the other hand, can be a better suited part for a DIY-Activity.

Selfmade Speed Brake Control
Many of the instrument panels are engraved with text, which is intended to be backlighted later. If you want your panels to look at least fairly like the original ones (what I highly recommend) you should either buy the panels from a manufacturer or you should have access to a CNC machine.
If you buy the panels without switches, buttons and interfacing they will also be much cheaper than buying them as plug and play version. At this point you should definitly not save on the wrong things because the panels get you the look and feel of a real airbus 🙂
The picture on the right shows my self made Speed Brake Control. The panel and the knob were purchased from a home cockpit parts manufacturer. This is a well suited part to test out your DIY-skills 🙂
Korrys
Now what is that? The Korrys are those small rectangular pushbuttons, that can be found on nearly every instrument panel in the cockpit. Those small parts are quite hard to replicate, if you want to be them as original as possible. Most of them consist of two separate chambers with differently coloured LEDs in it. Here are some challenges that are lying ahead:

A320 Autobrake-Panel (replica) with lighted Korrys
- The Korrys need to fit into your panels
- The Travelling distance of the pushbutton should be at least 2mm to be fairly original
- Cutting and applying the printed translucent covers
- Soldering the small LEDs and PINs, optimally onto a circuit board
There are some good approaches on making own Korrys on the Internet, here are three of them, for example:
-
PDF about selfmade Korrys from 19x19mm acrylic glass. The Page is unfortunately no longer available, but fortunately I printed a PDF of it when I first visited it. I hope it’s okay for the creator to provide it here. Original source was:
http://home.hccnet.nl/jwopdenakker/building%20tip.html - Overhead-Panel with selfmade Korrys of Karl from Vienna, Austria
- Making Korrys using RAFI Pushbuttons by Michael from Krefeld, Germany (Hispapanels.com-Option)
I will try the Hispapanels-Option like Michael described shortly and report about it.
Switches and Buttons
When it comes to switches and buttons, there are more options to do things yourself. Of course you need to buy the switches and buttons that fit into your panels, too. If you want them to look like the original ones, they will be more expensive than just customary ones that you can get in any online electronic shop. That is a question of your ambitions on realism.
When you have bought your switches and buttons you need to wire them and connect them to your interface card.
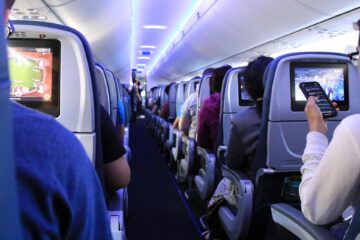
Interfacing
Interfacing is probably the most complex part of your home cockpit. Now what does this? Imagine, you’ve got a mechanical switch or button which you want to use to turn on the Fasten-Seatbelts Sign in your home cockpit. Somehow that signal has to be transferred to the simulator. So first of all, you need an Interface Card. Those cards usually consist about an USB-Connection and lots of Pins, where you can connect your switches and buttons.

Arduino Mega 2560
Source: https://store.arduino.cc/arduino-mega-2560-rev3
The cards are offered by many manufacturers in different versions, here only a few for example:
- Arcaze (Simple Solutions)
- Arduino
- Chinese Manufacturers via Ebay
- Leo Bodnar
- Opencockpits
After you’ve connected your interface card to your computer, it will be recognized as a Joystick. Then wire the switch or button with your interface card with a port of your choice. Depending on the quality of your card, you can define an Input in your card’s software and set some parameters. So you are telling your card to listen on a certain port for a signal to transfer it to your computer.
After you have done that, launch your FMGS-Software, for example Jeehell FMGS. In the Configuration-Program you can assign a predefined action to your switch/button push event, like “Turn on Seatbelt-Signs”. And that’s it! In this way you can wire your complete home cockpit. We are going to take a closer look on Interfacing in a future post, after you got started with Jeehell FMGS.
Backlighting
Backlighting is a topic that I really underrated for a long time in my home cockpit project. You have to consider, that If you want to build a closed shell – and/or you want to use Beamers instead of TVs for the projection system, you won’t have much brightness in your cockpit. For this reason and because of the general ambitions to realism, backlighted instrument panels are more than just “nice to have”.

Skalarki FCU with Backlight enabled
You can realize backlighting by 12V amber-coloured LED-stripes that you can cut according to your needs. We will take a closer look on this topic in a future post regarding electrics and power supply of your home cockpit, too.
Cockpit Structure (Shell)

Early Version of my selfmade Main Stand with Main Instrument Panels (MIP) mounted
When it comes to the cockpit shell, the main stand, the sidebases or your pedestal – it’s DIY time! You can make most of those parts from wood and cut them with a conventional jigsaw. But a bench saw with a feeding can help a lot.
If you now have probably access to a carpentry with professional machines, too – this is your home run! I’ve seen fantastic results from homecockpit builders that have access to professional machines. Otherwise don’t despair – you will learn and get better with every piece, as I did!
Take a look at my self made side window. It’s made from five millimeter medium density board. The only tools I used were my jigsaw and a compressed air tacker.

Selfmade Side-Window of an A320
Warning: If you are not familiar with the tools mentioned above, be careful and get yourself assistance from an experienced friend or neighbour when you are insecure at the beginning. Some DIY-markets offer free regular trainings for multiple specializations. Maybe so in your city?
List of Tools
When you’re about to start with DIY, here’s a inital list of tools and things you might need:
- Cordless Screwdriver with two battery packs and a set of good drills for wood and metal
- Jigsaw with sawblades for wood and metal
- Clamps
- Tongs
- Hammer
- Ruler
- Protractor
- Hot Glue Gun
- Abrasive Paper

8 Comments
Andrea Daniel · November 17, 2018 at 11:21 pm
Hey!
first of all thank you so much for this amazing Blog – this is realy helpfull!
I would like to know where I can find the measurements for the cockpit structure as I would like to let a carpentry do this work!
Thank you in advance and please keep going on – this is fantastic
!
Best regards Andrea Daniel
Marco · November 18, 2018 at 8:48 am
Hi Andrea, thank you very much for your positive feedback, I appreciate that a lot. I will look for some measurements in my folders and get back to you asap. Best wishes, Marco
Pedro · February 11, 2020 at 3:54 pm
Parabens pelo trabalho. Gostava de saber se é possivel fornecer-me algumas dimensões pois gostaria de construir um cockpit em minha casa.
Marco · February 12, 2020 at 10:31 pm
Olá e obrigado pelo seu comentário e por visitar o meu blog! Para as dimensões A320, recomendo http://www.simpit.de/a320dim/page_01.htm Muitas saudações da Alemanha, Marco
Jakob · April 7, 2021 at 12:55 am
Hi Marco,
Wonderful project of yours! I started building my own A320 homecockpit this year. Still pretty much at the beginning but motivated. In case you know the site eulenfriends, you’ll find some images there. I was wondering if you have any drawings of your side window design, and would be willing to share them with me. Thx a lot in advance. Best regards from southern germany, Jakob 🙂
Marco · April 28, 2021 at 11:08 am
Hi Jakob, thank you very much for your visit and feedback! 🙂 You can find sources for measures in my latest post “Where to find measures”. My side window is based on the measures mentioned there. Best regards too!
Marco · May 1, 2023 at 7:27 pm
Hey Marco , I’m Marco too haha 😄 how much would a mip cost. I’m building an A320 Cockpit but have no idea any tips or advice
Marco · August 1, 2024 at 10:42 am
Hi Marco, check out: https://www.skalarki-electronics.com/en/onlineshop/category/a320-mip-components.html